How to organize Instagram leads with tags and custom fields
Use four coaching tags and three fields to keep signup source, call progress, and the owner’s actual goals clear in every contact record.
 LinkStack
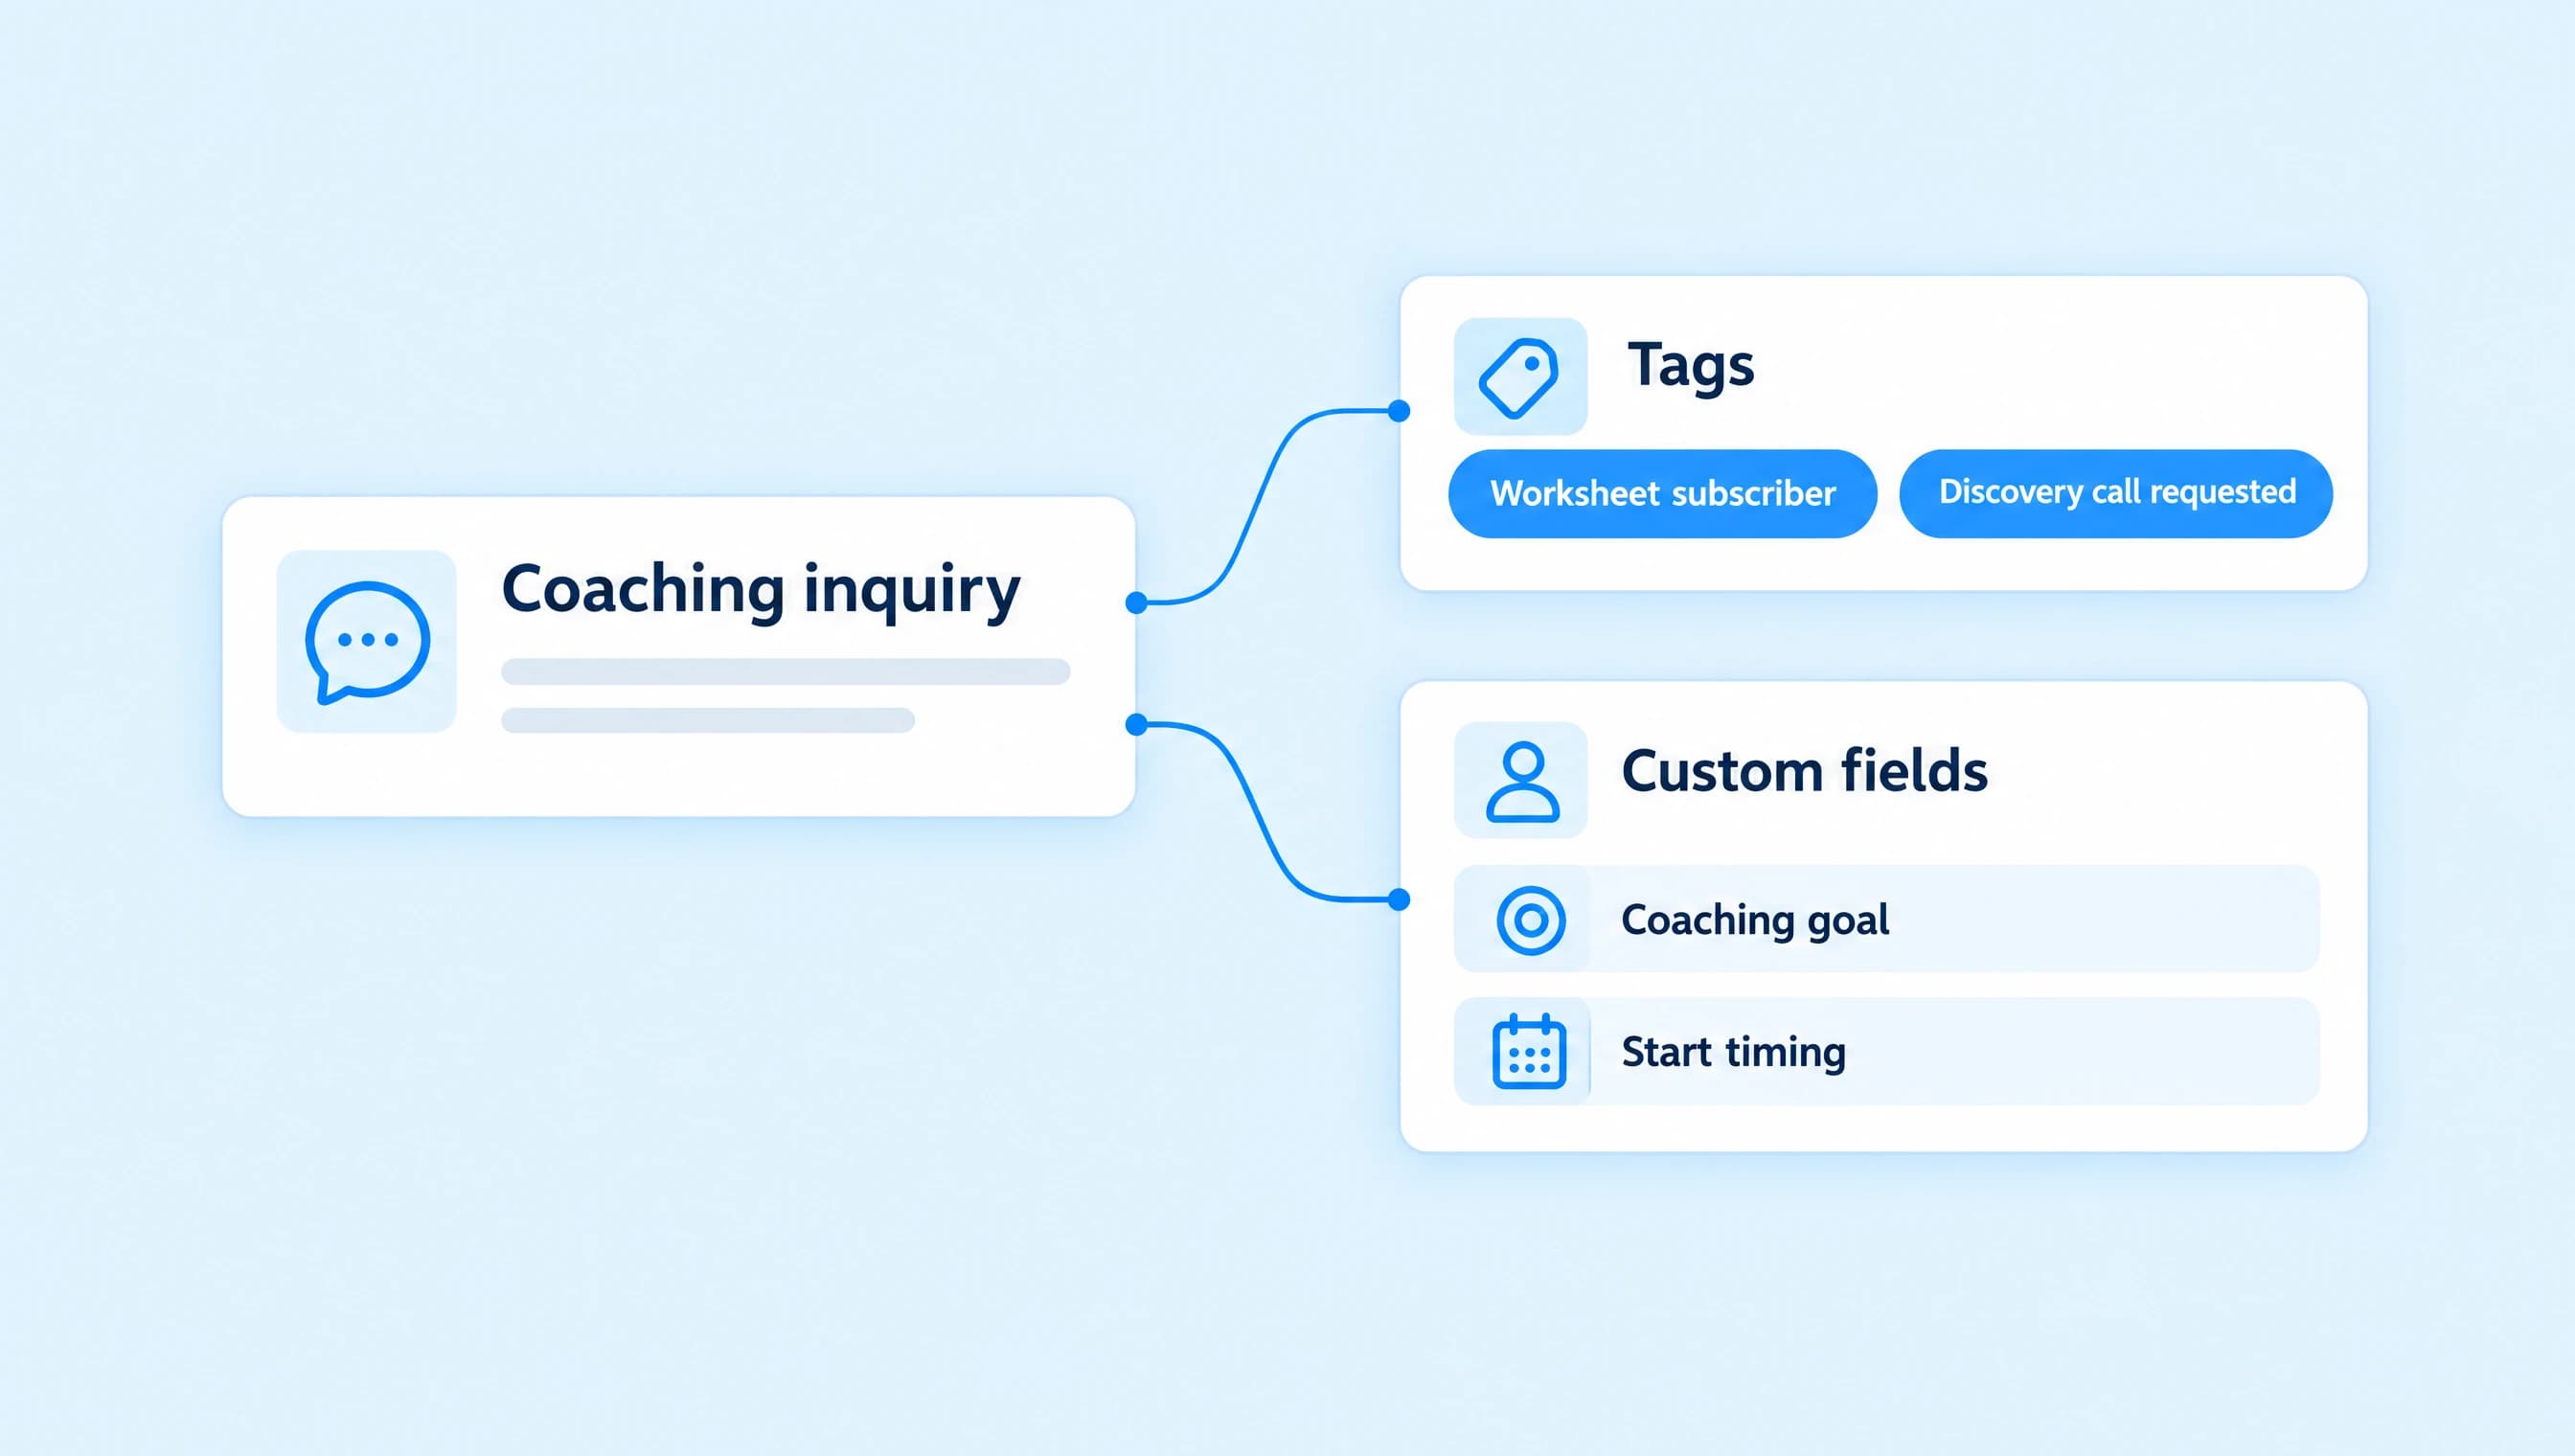
Use tags to mark the next action a coaching lead needs, and custom fields to keep the answers you will use in the conversation. Start with a few labels you can apply consistently. A contact record should tell you what the person wants and what should happen next.
Northline Coaching uses one tag for the worksheet signup and three for progress toward paid coaching. The contact fields hold the owner's goal, current obstacle, and timing. A booking-link click does not move someone into Call booked, and an email-looking answer does not make them a subscriber.
Give every tag a rule
Vague tags such as Hot lead leave room for different interpretations. Name an action or a fact you can check. Use these four tags in a Coaching folder:
| Tag | Add it when | Keep it accurate |
|---|---|---|
| Worksheet subscriber | The person gives a valid email after agreeing to the worksheet email sequence. | Keep it as the signup source. Current email subscription status still controls sending. |
| Discovery call requested | The person explicitly asks to book or asks for the discovery-call link. | Remove it when a booking is confirmed or the person withdraws the request. |
| Call booked | You have a confirmed reservation in the booking system. | Remove it if the booking is cancelled or the person becomes a client. |
| Client | You confirm that the person has joined paid coaching. | Remove the earlier call-stage tags so the next action stays clear. |
Worksheet subscriber can stay alongside a call or client tag because it records how the relationship started. The other tags describe current progress. Make that distinction clear to anyone who helps with your Inbox.
Do not use Worksheet subscriber as a substitute for LinkStack's email subscription status. Someone can keep the tag after unsubscribing. Later email steps must still respect that opt-out.
Create and assign tags from the conversation
Open Inbox, select a conversation, and expand the contact sidebar. Under Contact Tags, choose Manage tags.
Search for a saved tag before creating another one. If it does not exist, type its name, select the Coaching folder or create it, and choose Add tag. Repeat for the labels you need. Changes save immediately; Done closes the dialog.
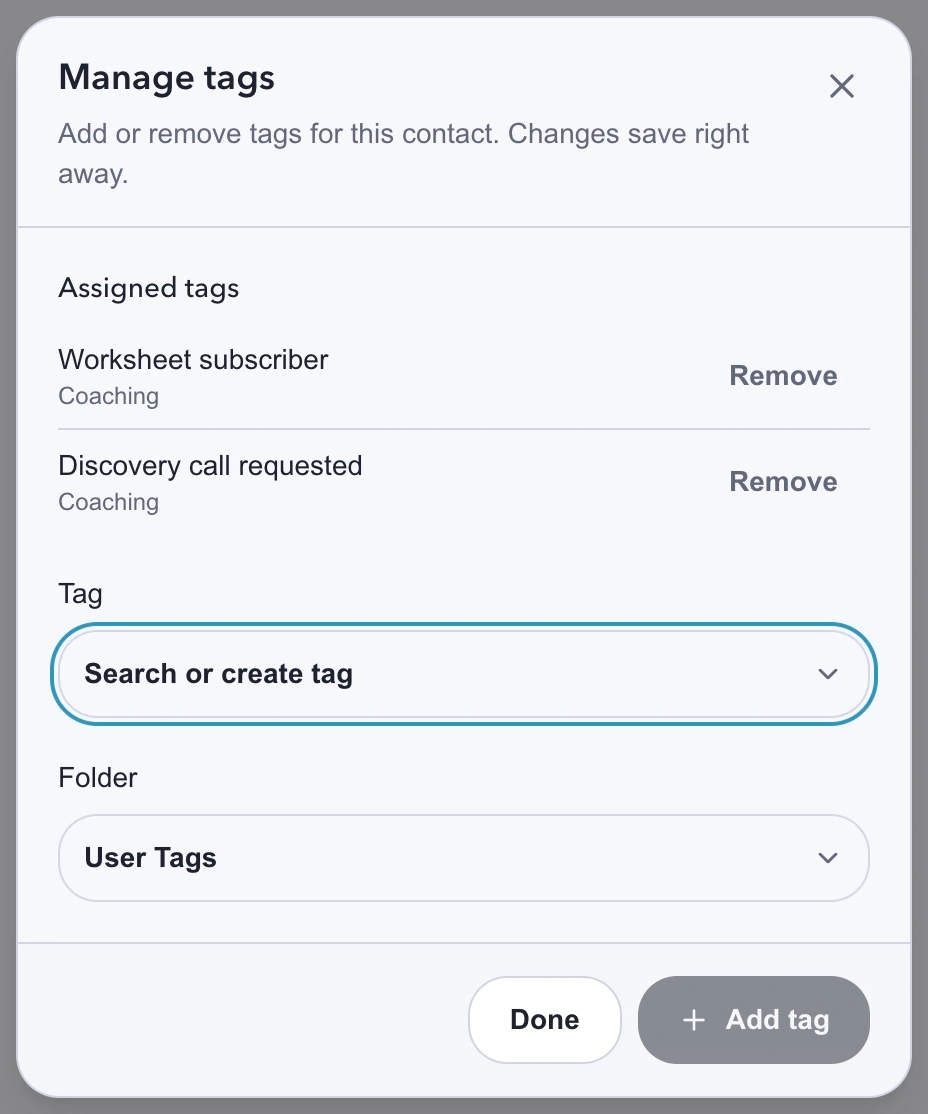
The signup source and the call request answer different questions. A requested call still needs a confirmed booking.
Use Remove beside an assigned tag to take it off this contact. The tag stays available for other contacts. The Inbox tag guide also covers bulk changes when several conversations need the same update.
Avoid selecting a mixed group and applying Call booked to all of them. Bulk tag changes save quickly, and tag-triggered workflows can react to them. Inspect the selection and any connected workflow before applying a change.
Save the answers you will need before a call
Open the contact in Audience. In Custom Fields, choose Manage fields, then New field. Create these definitions with Type set to Text:
| Field | What to save | A usable value |
|---|---|---|
| Coaching goal | The change the owner wants to make, using their words. | Explain my service offer more clearly |
| Main obstacle | What they say is getting in the way. | People ask what is included after reading the page |
| Start timing | When they want to work on it. | Next 3 months |
For Start timing, use the same three values each time: Next 3 months, Later, or Not decided. Leave the field blank when you have not asked. Not decided means the person said they were unsure; a blank means you do not yet know.
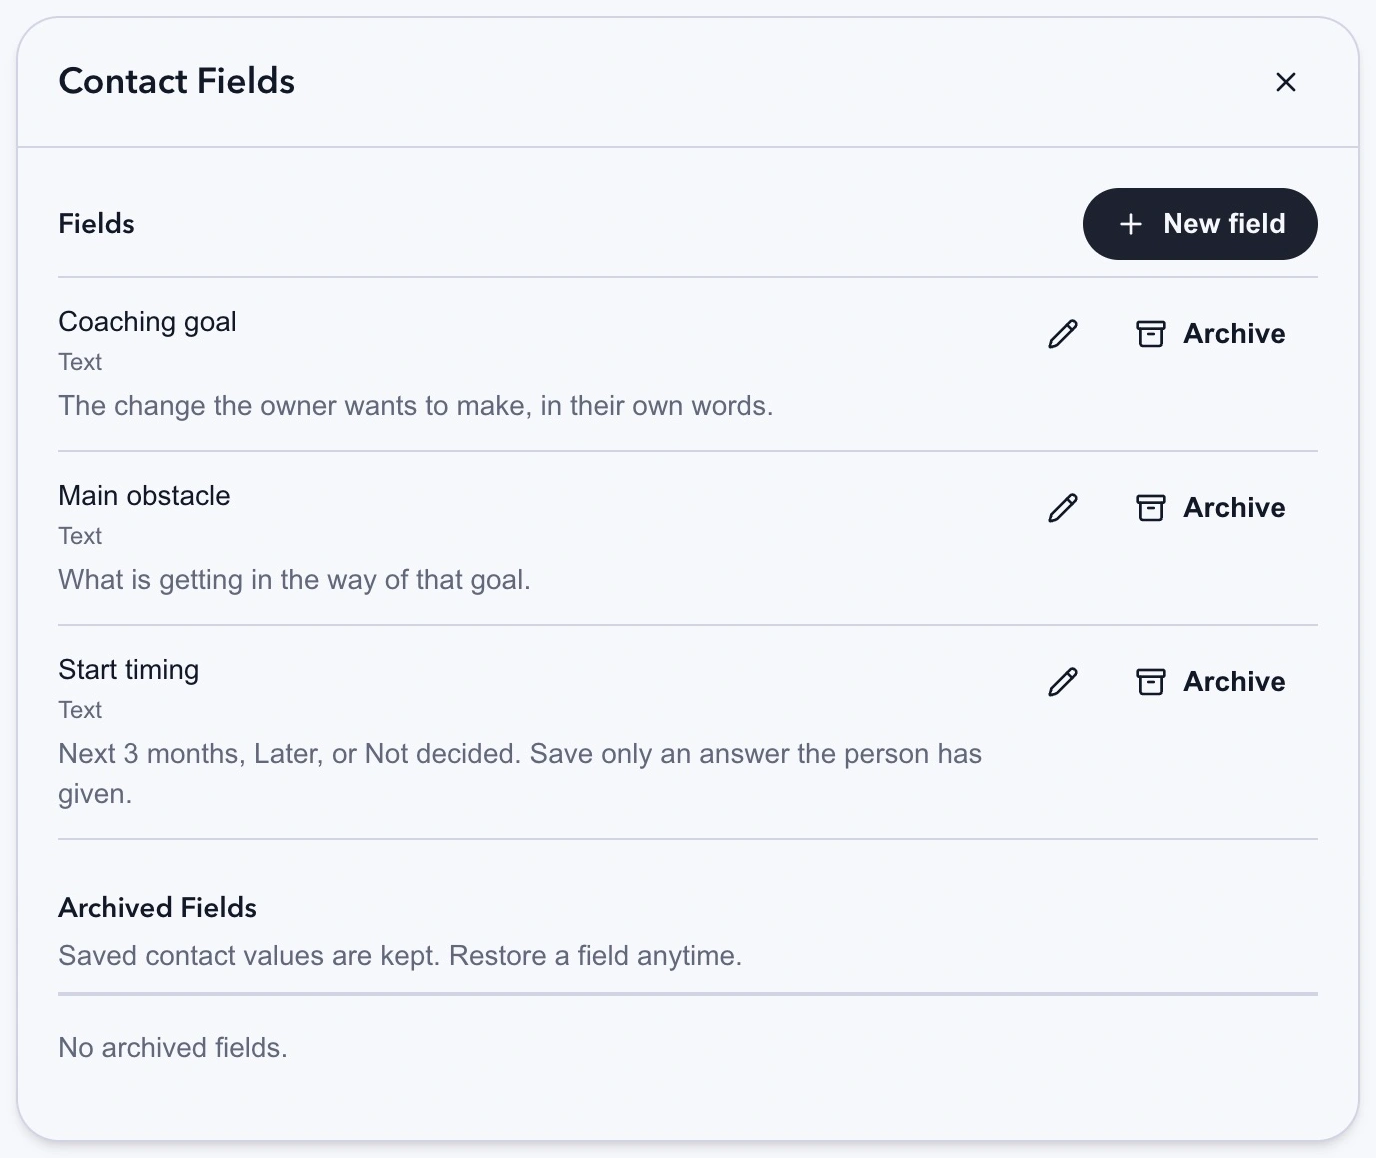
Use fields for the answers you need to read before a call. Consistent names make the same details easy to find on each contact.
Return to the contact and select a field value to edit it. Save the answer without turning it into a judgment. "People ask what is included" is useful context. "Bad at sales" is your interpretation and gives the coach less to work with.
Text fields keep this setup flexible. If the person gives a specific date later, you can add a Date field for that purpose. Avoid storing a promised appointment in Start timing; the booking system is still the place to confirm the time.
You can also create fields through Manage Custom Fields in the Inbox contact sidebar. If a field is no longer useful, archive it to keep its saved values. Archiving a field does not stop workflows that already reference it, so inspect those workflows before retiring it from your process.
Collect one answer at a time
Ask questions that match the fields. You do not need to ask everything before responding to the person's original message.
What would you most like to change about the service you sell?
Save the answer in Coaching goal. If they have already explained it, use that answer instead of asking again.
What is getting in the way of that right now?
Save their reply in Main obstacle. When timing matters, ask:
Are you looking to work on this in the next three months, or later?
The answer can inform Start timing without becoming a demand for an exact start date. If they are unsure, save Not decided and let the conversation continue.
For a deterministic workflow, add Data collection inside a Send Message step and map each accepted reply to the appropriate custom field. Use Actions on valid input for the change that should follow a valid answer. The workflow step guide covers data collection, Set User Field, and tag actions.
Keep primary email collection separate. Select the Email reply type and save it to the contact profile when collecting an address. Use explicit subscription wording before enabling email opt-in. A custom field whose type is Email does not update the primary email or grant marketing permission.
Give an AI agent only the fields and tags it needs
An assigned agent can help save these answers, but you must approve the exact resources and actions. In the agent's Knowledge area, open Resources and actions, select the three fields and the relevant tags, and enable the corresponding field or tag actions.
In Instructions, describe the mapping plainly:
Save the owner's stated desired change in Coaching goal.
Save their stated obstacle in Main obstacle.
Save Start timing as Next 3 months, Later, or Not decided only
after they have answered. Leave missing information blank.

Add Discovery call requested when they explicitly ask to book
or request the booking link. Do not infer it from a like or click.

Do not add Call booked or Client. The coach updates those after
checking the booking or purchase record.
Keep Review first while checking the proposed writes. An assigned agent handles ongoing conversation; the workflow's single AI Reply step does not change contact data. The AI contact changes guide explains the distinction and how saved changes can start a separate workflow.
Save a view for the next coaching conversation
In Audience, select the Discovery call requested tag and add a Start timing filter equal to Next 3 months. Confirm that the matching list contains the people you expect.
Choose Segments, then Save current filters. Name the segment Call requests soon and save it. Reopening it evaluates the filters against the current contacts. The search text you type above the list is not saved in the segment, so put essential criteria in filters.
A saved segment does not automatically enroll future matches in an automation. If you choose Subscribe to automation, you are enrolling the selected contacts for that operation, with the usual consent and messaging-window checks. Read the Audience segment guide before using a saved view to send anything.
Check one contact from the Inbox through to the saved segment. Its goal and obstacle should match the conversation, its tag should describe the next action, and its subscription status should reflect what the person agreed to. That is enough structure to make the next reply useful without filling the record with labels you never use.