
How to create a website for affiliate marketing with LinkStack
Build a focused affiliate page with useful recommendations, clear disclosures, and links you can check and update.
To create a website for affiliate marketing, start with a page that answers one useful question, explains your recommendations, and gives readers clear links to buy. A LinkStack bio page works for a compact creator site: an introduction, product links, and room for your own notes.
If you also write long reviews or publish regular articles, link to them from the page so visitors can read the detail before buying.
1. Choose the question your page will answer
"Everything I like" is hard to organize. "Gear for a toddler's first bike ride" gives you a reason to include each item.
For that example, your page could explain what to look for in a helmet fit, then link to the gear you actually recommend. Keep claims within what you know. Owning one helmet does not mean you have compared every helmet on sale.
Write a short note for each recommendation: who it suits, why you chose it, and any limitation a buyer should know. Use your own photos when you have them. For Amazon, the application requires a public site with original content; a finished LinkStack page does not guarantee approval. Amazon's participation requirements
2. Create the page and give it a clear name
Open Link in Bio and choose New bio site. Enter an available handle, then Continue to reserve it as a draft. Choose a style and add your name and introduction. Publishing is a separate step.
Your introduction should tell a visitor what they'll find. For a family outdoors page, that might be "Bike gear and day-hike supplies for parents taking small kids outside." Use words that match the recommendations you actually plan to add.
The first bio page guide covers setup and publishing. If you want to change the look afterward, use a bio theme. Bio themes change the page's appearance; they do not supply recommendations or write reviews for you.
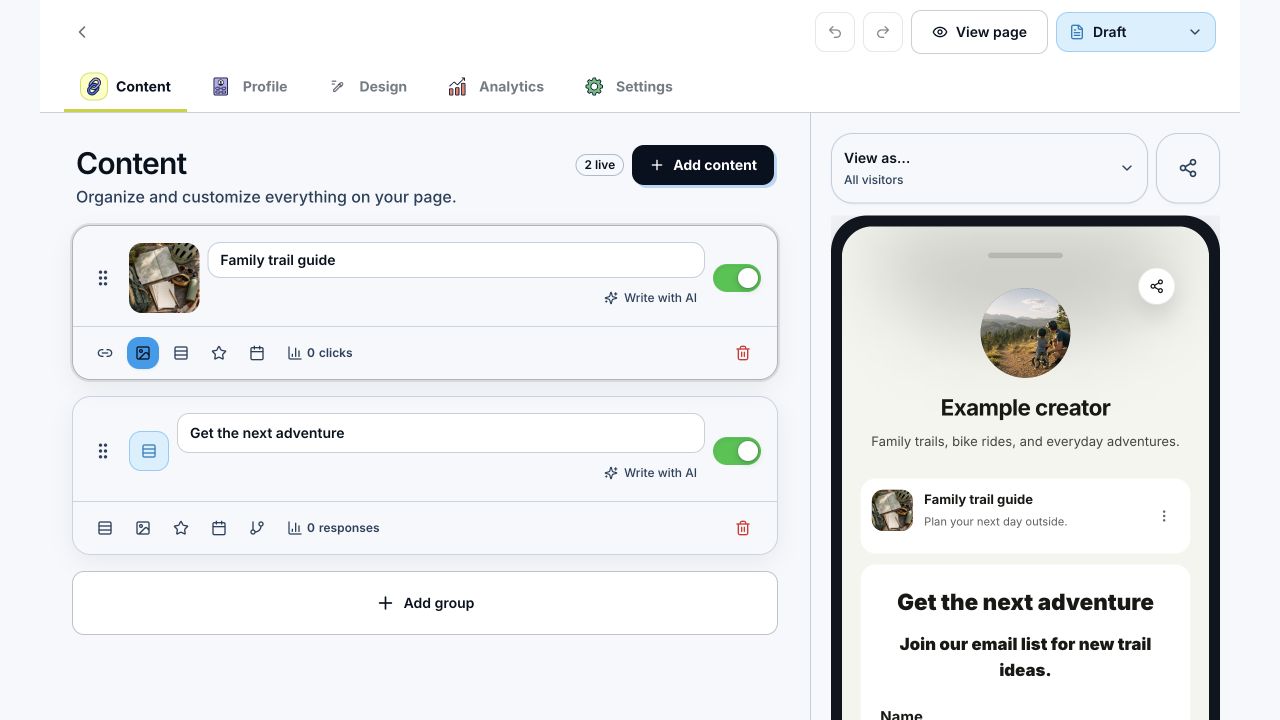
Use Add content to build the page, then check the phone preview. This example shows a link card and a form.
3. Add recommendations and explain the affiliate relationship
In the editor, choose Add content, then Text for the introduction or a short recommendation note. Keep the most useful buying detail near its link.
Add a clear commission disclosure where visitors will see it before or with the recommendation. For example: "I may earn a commission if you buy through these links." The FTC says affiliate relationships should be disclosed clearly and close to the recommendation; an unexplained "affiliate link" label may not tell readers you get paid. FTC affiliate disclosure guidance
Amazon also requires its specific Associate statement on your site and a disclosure near affiliate links. Follow Amazon's disclosure instructions if those are the links you use.
Use the merchant's permitted link format. In LinkStack, a Text card can include Button text and a Button link when you want a direct destination. To reuse a managed Link, choose Add content, then Link, and select it from Use a saved Link. The guide to adding Links explains the creation flow.
For Amazon links, check the route before using a redirect. Amazon excludes purchases sent through an intermediate site without a visitor click or another affirmative action there. A direct merchant link may suit your setup; a destination label alone does not settle eligibility. Amazon commission rules
Label the destination plainly, such as "View the helmet on Amazon." Avoid a row of identical "Shop now" buttons that forces visitors to remember which product each one belongs to.
4. Decide whether you need country routing
A single destination is enough when it works for your audience. Check where your visitors are before adding regional setup.
If you already have several Amazon storefronts, Geo routing can send visitors to the local URL you supplied, with a primary destination for other countries. You need working storefronts and the applicable Amazon enrollment first.
For Amazon product links, Affiliate Programs can reuse your saved marketplace tags. Review the generated destinations: matching a country does not prove that the same product is available there. Reusable programs have their own plan allowance; check pricing before planning a setup around them.
5. Publish, tap through, and read the results
Before publishing, use the phone preview to check the page's order. Put the recommendation mentioned in your latest post where visitors can find it quickly. Keep the disclosure readable beside the recommendations it covers.
Publish the page, then open its public URL while signed out. Tap each button and confirm the product, merchant, and tracking parameters. Check the page on a phone too. A supported app link can attempt to open the retailer's app, but the device and browser affect the handoff.
After visitors arrive, bio analytics shows page views and card taps. A tap means someone followed a link. Check the affiliate program's own reporting for credited orders and earnings.
When a recommendation changes, update its note and destination together. Someone reading "the compact model" should land on that model.
Create your affiliate page, add one recommendation with its disclosure, and check the public page before adding the rest.