
How to create and publish a digital product
Set the product details, price, and delivery, then customize the landing page and publish.
In this article
What products support
Digital products can include PDFs, ZIPs, audio, video, images, and documents. Product pages support a thumbnail, description, CTA label, summary, details, and a custom button color.
Use guided setup
Continue and Back move between editing steps without publishing. Normal draft saves keep your work. Continue on my own hides the guide; Continue setup reopens it. Reloading restores saved work; unsaved local file selections must be selected again.
- Choose Add a product on Home, or add a product while setting up an Instagram automation.
- Choose Free Resource or Digital Product from the available types. The editor opens with an empty name and description and a guide. No draft is saved just by opening it.
- Add a title and description, then continue through imagery, price, and delivery files. The URL follows the title until you customize it or reopen the saved product. Enter required details before uploading cover media; uploads create a draft when needed. The guide takes you to the existing fields and tabs.
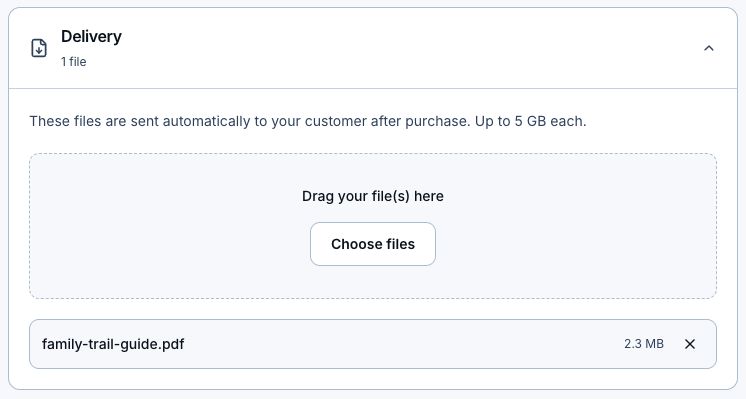
- Use Save as Draft to keep your work. Preview the page and check the price and attached delivery files. Paid products use the existing payment setup requirements.
- Choose Publish when ready. If you came from an Instagram automation, use Use in automation to return to that saved workflow with the published product selected.
Use the full editor for more options
You are already in the full editor. Use its tabs for appearance, thumbnails, a custom slug, Page content, pay-what-you-want pricing, checkout fields, and order bumps. If you turn on Order bump without selecting a product, saving automatically turns it off. Add follow-up does the same when it saves before opening the automation chooser. The product picker also offers other enabled product types, each with its own editor.
Write your page and set up checkout
- Open Landing page. In Page content, write your description and use the rich-text toolbar for headings, lists, links, images, and videos.
- Expand Checkout to edit the button copy and customer questions. If your page already has an FAQ, you can edit its questions and answers; Show FAQ before checkout controls its placement.
- Page content always appears first. Existing standalone text has been moved into Page content, and the old section builder has been removed.
- Preview the page, then use Save as Draft or Publish.
Preview before publishing
Digital products, free resources, memberships, and appointments do not need a bio page. Course, custom-product, and webinar sales previews need a saved bio page; it can be a draft. Products previews show saved content. The editor preview remains the place to check unsaved edits.
- Save as Draft, then open Products. Course changes autosave; wait for All changes saved.
- Click Preview on the draft's row, or open its three-dot menu and choose Preview product. For published products, use Preview product for a private preview or View for the public page when available.
- Stay signed in to the account that owns the product. A preview link will show not found to anyone else.
- Review the page without creating a purchase, membership, enrollment, booking, or registration. Preview visits do not add product page views.
- For courses, use Student preview to review draft lessons, videos, and downloads.
Pricing and files
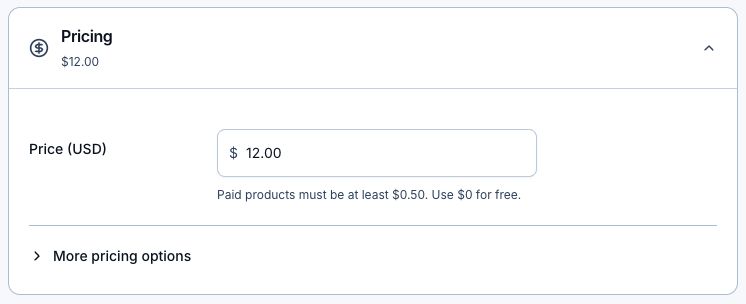
- Normal paid products need a price of at least $0.50.
- Pay-what-you-want products can have a $0 minimum and an optional suggested price.
- Digital product files can be up to 5 GB each.
- Free, Starter, and Growth have different LinkStack product fees. Stripe processing fees still apply.
After publishing
- If you started from an Instagram automation, return to that draft with the published product selected using Use in automation in the editor guide.
- Open the product details page to view stats, files, and status.
- Use Add to bio when the product should appear as a product card.
- Use the public product link when you want to share the product directly.
- Review the product's purchase confirmation email. Enabled download confirmations can deliver secure access for completed paid orders and free resource claims without a marketing workflow.
- Growth adds purchase follow-ups and checkout-recovery email workflows for subscribed contacts. Save sender details under Settings → Email before publishing those workflows.
Related articles
Still need help?
Support & feedback