
How to set up Stripe for digital products
Connect your own Stripe account so buyers can check out and payouts can go to you.
In this article
Before you start
Stripe setup is required only before paid checkout can run. Free products and appointments remain available without Stripe. You can build paid products first, but their checkout stays paused until Stripe says payments are ready.
Connect from Settings
- Open Settings.
- Find Stripe setup.
- Click Connect Stripe.
- Complete the Stripe onboarding flow.
- Return to LinkStack and read the status shown on the Stripe card.
- If the card says Under review, no action is needed. You can leave the page while Stripe checks the details.
- If the card says Needs information, click Review in Stripe and provide what Stripe requests.
- Confirm Payments shows Ready before sending buyers to a paid product.
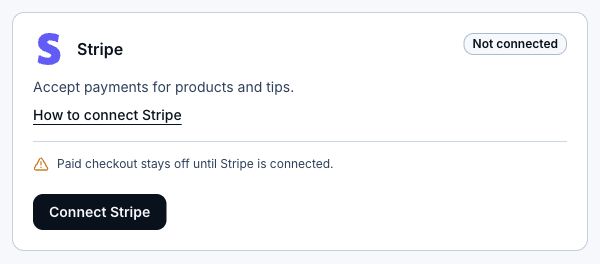
Connect from Products
- Open Dashboard, then Products.
- Find the Stripe setup card.
- Click Connect Stripe or Continue in Stripe.
- Complete Stripe onboarding.
- Return to Products. While Stripe is reviewing the account, LinkStack keeps checking every 15 seconds and updates the screen when the status changes. Returning to the tab also checks for updates; no manual page refresh is needed.
- Wait if the status says Under review, or click Review in Stripe if it says Needs information.
- Confirm the status says Payments ready before sharing a paid product.
What the status means
- Not connected means no Stripe account is attached yet.
- Setup incomplete means the Stripe onboarding form still has information to submit.
- Under review means Stripe is checking submitted details. No action is needed.
- Needs information means Stripe has a question or needs another document. Click Review in Stripe.
- Restricted means Stripe stopped the account until an issue is resolved.
- Disconnected means LinkStack lost access to the saved Stripe account. Paid checkout is paused until you reconnect.
- Payments ready means buyers can check out.
- Payouts ready means Stripe can send funds to the connected account.
Reconnect after Stripe disconnects
If LinkStack loses access to the saved Stripe account, Payments and Payouts change to Disconnected and new paid checkout stops. Your Stripe account and past LinkStack orders are not deleted. LinkStack emails the account owner once when a live paid product, tip jar, or active membership could be affected.
- Open Settings, then Payments.
- Find the Stripe card and click Reconnect Stripe.
- Confirm that LinkStack should remove the broken connection and start Stripe setup again.
- Complete Stripe onboarding and return to LinkStack.
- Confirm Payments shows Ready before sharing a paid checkout again.
Check the buyer checkout
- Open a published product page. Private previews do not accept payments.
- Choose a membership tier, appointment time, or webinar date when needed, then enter the requested buyer details and any discount code.
- Continue to payment. Secure Stripe fields appear on the product page for every paid product type.
- Review the final charge in Stripe, including the recurring interval for a membership, before paying. Free orders skip payment and open access or confirmation.
- If payment fields fail to load, click Try again in the payment panel. This reloads the existing checkout without creating another order or reservation.
How long verification takes
Timing varies. Stripe asks you to allow 3–5 business days for submitted identity or business documents. LinkStack updates the saved status from Stripe automatically, so you do not need to keep the page open or repeatedly refresh it. Return to Stripe only when LinkStack says Needs information or Restricted.
Related articles
Still need help?
Support & feedback