
How to add AI knowledge sources
Upload files or write trusted facts for your agents to reference.
6 min read
In this article
What knowledge can be
- Upload: PDF, DOCX, TXT, or Markdown files up to 5 MB each. Scanned PDFs need a text layer.
- Write text: facts, policies, FAQs, and product notes, up to 100,000 characters per source.
- Existing sources, including previously imported URLs, remain available to your agents. New URL imports are hidden for now.
Create a knowledge source
- Open Dashboard → AI → Knowledge, then click Add source.
- Choose Upload files, then select files or drag them into the upload area. You can add several files together; any failed file shows its own error.
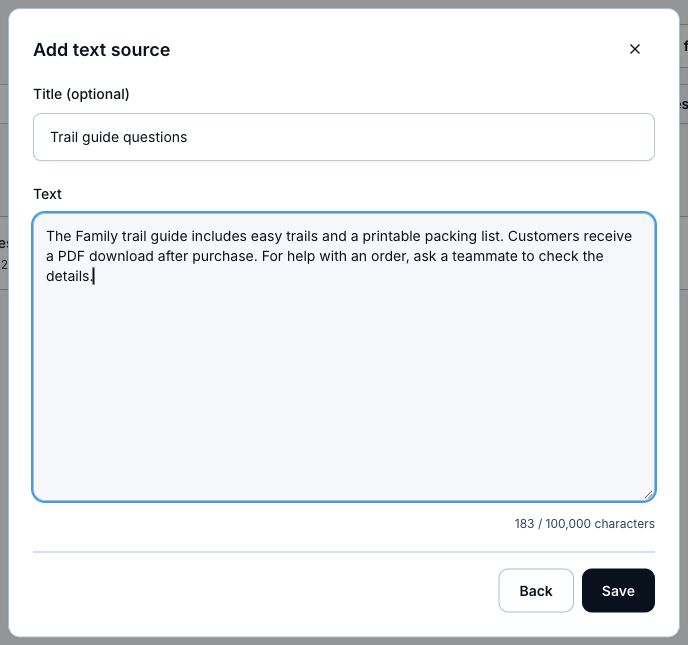
- Choose Write text to paste or type facts. A title is optional; without one, the first line becomes the title.
- Click Save for text sources. Back returns to the source choices without losing your draft.
- Open a saved source to edit its title or text, retry indexing, or Refresh from URL after the page changes. Imported URL text is read-only. Refreshing replaces the imported page text. Indexing starts automatically after saving; the source list shows Queued, Indexing, or Retrying until it finishes. If it fails, open the source to read the error and retry. If a website blocks imports, use Write text or Upload files instead. Wait for indexing to finish before testing.
Assign it to an agent
- Open AI, then Agents.
- Open the agent that should use the source.
- Open the Knowledge tab, then choose Add existing to open the shared library.
- Choose Preview beside any source to read its saved content, then Back to sources to return with your selections intact. Uploaded files also offer Open saved text in a new tab, both on the row and in the preview. This opens the extracted text saved in Knowledge; original PDF or DOCX formatting is not retained.
- Select individual sources or a folder to include its current sources and subfolders, then Use selected sources. The agent page shows only selected sources. Removing one here keeps the shared source available to other agents.
- Use Upload files or Write text on the Knowledge tab to add new knowledge. This also saves the source in the main library.
- Sources created here are selected automatically. Save the agent, or wait for the editor’s Saved status, to apply source assignments.
- Run a Playground test that should trigger the new knowledge.
Organize the shared library
- In AI → Knowledge, use New folder. Open a folder before creating one to make a subfolder.
- Drag a source by its handle onto a folder row, or onto the Library breadcrumb to move it to the root. Select several visible sources to drag them together. You can also select sources and use Move to folder, or choose Save in folder when adding new sources.
- Use folder breadcrumbs to go back, All sources to see the flat library, or search. Search within a folder includes its subfolders.
- For keyboard moves, focus the source’s drag handle, press Space, use arrow keys to choose a folder, then press Space again. Escape cancels the move.
- To permanently delete a source, use its trash control in the shared library and confirm. This removes the source and its index from every agent using it. Existing replies remain unchanged.
- Rename or delete folders from their row controls. Deleting a folder keeps its sources and immediate child folders at the library root. Agent assignments stay unchanged.
- Folder selection for an agent includes current sources only. Add sources again when you want an agent to use new content added to the folder later.
Helpful tips
- Include the actual destination URL and explain when the agent should share it.
- Keep each product or product family in its own source when the details differ.
- Keep unsupported promises out of knowledge.
- Keep unrelated topics in separate sources so the agent can find the relevant information.
- If the agent must never guess an answer, add that rule to its Instructions.
Related articles
Still need help?
Support & feedback