
Choose a plan and manage usage
Compare plan limits, choose how often you pay, and return to your work after checkout.
3 min read
In this article
Choose a plan
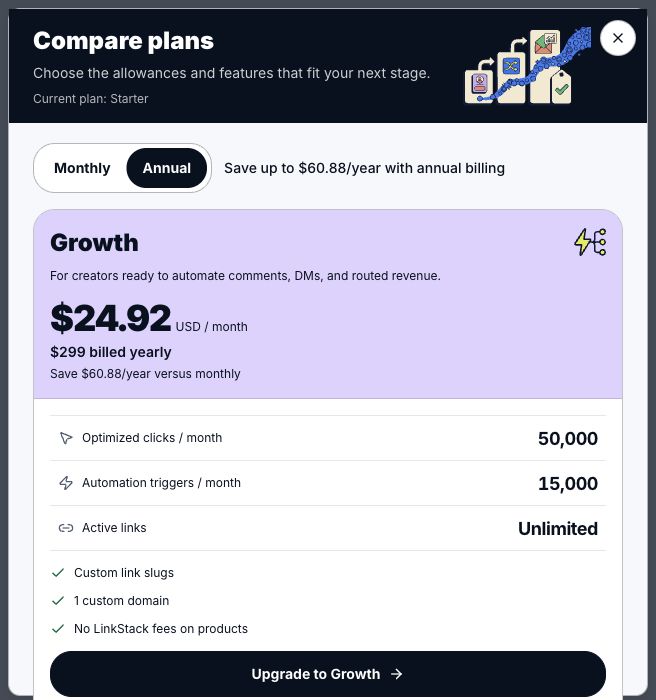
- Open Pricing or Settings → Billing → Compare plans. You can also choose See upgrade options from a usage notice or open an offer when you select a paid capability.
- Choose Annual or Monthly above the plan cards. Annual shows a monthly equivalent plus the full yearly charge in USD. An explicit billing selection follows you through signup, login, and billing.
- Compare optimized clicks, automation triggers, and active links first. Public Pricing shows the full comparison below the cards; select a card’s allowance label for its definition. Feature and usage offers recommend a higher plan that supports the requested action and fits recorded usage; general comparisons stay neutral.
- Choose the plan’s upgrade button. Free accounts open embedded Stripe checkout. Paid plan changes open a proration review before confirmation. Review the seven-day guarantee’s first-purchase and usage restrictions beside checkout.
- Check Stripe’s final payable amount, including applicable discounts, taxes, or currency conversion, before confirming. LinkStack selling fees and Stripe processing fees are separate.
Read usage notices
- Below 70%, the ordinary Upgrade entry stays quiet. At 70%, navigation shows compact usage information. At 90%, one top banner can be dismissed.
- At the limit, the notice explains the next action’s restriction or whether activity can continue. When a higher plan can resolve the limit, the notice offers that upgrade.
- Clicks and automation trigger starts use the recorded usage period and reset date. Active links do not reset monthly; archive old links to free space.
- Dismissals apply to this browser, account, plan, quota, allowance, period, and severity. A higher severity or changed period or allowance may show a new notice. Link warnings can reappear after capacity falls below 70% and rises again. Confirmed blocking notices stay visible.
- If usage is unavailable, LinkStack does not display a made-up zero. Check Billing again after the data loads. AI continues to use its existing credit balance and top-up controls. Choose Quick Refill for 7,500 credits at $10 or Extra Runway for 15,000 credits at $15. Monthly included credits renew at the end of your usage period; top-up credits never expire and carry over across renewals, including remaining credits from earlier purchases.
Review AI credit spending
- Open Settings → Billing → AI credit history. You can also open the credit popup and choose View usage.
- Review the date, activity, and credits spent. History includes spending from both your monthly allowance and top-ups, newest first, with 25 entries per page. Use Previous and Next to browse older activity. Times use your account timezone.
- Choose View conversation, View test chat, View agent, or View workflow to open the saved source. Some older entries, writing helpers, and deleted sources have no reliable destination and show Not linked. Opening history or a source link does not use AI credits.
- Temporary reservations and credit purchases are not spending entries. Reply formatting appears as its own charge. If history is unavailable, choose Try again; an error does not mean you have spent no credits.
Return to your task
- Close an offer or back out of embedded checkout to continue in the mounted editor. Your selected billing cadence stays selected when you reopen the offer.
- Save any unsaved edits before continuing through a payment redirect.
- After completion or cancellation, choose Return to your work. An absent or invalid task destination falls back to Billing. If checkout fails, retry with the selected plan and billing cadence.
Still need help?
Support & feedback